It is that time of year again. The new edition of Microsoft 365 for IT Pros is out, and this one brings the biggest structural change we have made in years. What used to be one large book with a single companion volume has now grown into a bundle of four focused books. Splitting the content allows us to go deeper while keeping the main book maintainable. Together, they deliver more than 1,700 pages of practical guidance for people who run Microsoft 365 every day.
A bit of history
The series goes back to May 2015, when it started life as Office 365 for Exchange Professionals. Over time, the platform expanded, the audience broadened, and the book evolved with it. This year also marks the move from Office 365 for IT Pros to Microsoft 365 for IT Pros. The name changed, but the focus did not. We still cover the services and workloads administrators, architects, and technologists rely on.
I joined the writing team in 2024. What stood out to me from day one is that this is not a traditional technical book. Most books age the moment they are published. This one does not. We update it every month and keep tracking the constant stream of changes across Microsoft 365. That evergreen model, combined with real-world experience, is what makes this book stand out. It is written for people who manage Microsoft 365 daily and need the most up-to-date content.
What you get
The bundle now consists of four books, each focusing on a specific area:
Microsoft 365 for IT Pros is the core book. It covers the Microsoft 365 ecosystem from an administrative perspective, including identity, Exchange Online, SharePoint Online, Teams, OneDrive, and overall tenant management. This edition adds a dedicated AI and Agents chapter covering architecture, licensing, deployment, governance, monitoring, and cost control for Copilot and related technologies.
Automating Microsoft 365 with PowerShell is the PowerShell / automation book. It focuses on automating Microsoft 365 with PowerShell and Microsoft Graph, providing practical examples you can apply in real-world environments.
Microsoft Purview for IT Pros is a new standalone book. It covers compliance and data governance, including data lifecycle management, eDiscovery, data loss prevention, information protection, and communication compliance.
Power Platform for IT Pros is the 2nd new standalone book. It focuses on the administration and governance of the Power Platform, including environments, Dataverse, solutions, application lifecycle management, and platform security through policies and controls. It also covers scenarios for Power Apps, Power Automate, AI Builder, and Copilot Studio.
Splitting the content into separate books allows for more depth and focus, while making the core book easier to consume and maintain. And for those who need it, each companion book is available separately, offering the same monthly updates for that book throughout the subscription.
Who this is for
Tenant administrators, consultants, architects, engineers, and technical leads will get the most value from this edition. If your job involves Exchange Online, Entra ID, SharePoint Online, Teams, OneDrive, Purview, Power Platform, Copilot, PowerShell, or Microsoft Graph, this set has been designed for you.
Availability
We use Gumroad.com to publish and distribute the books. All books are available in EPUB and PDF formats and can be converted for use on Kindle devices.
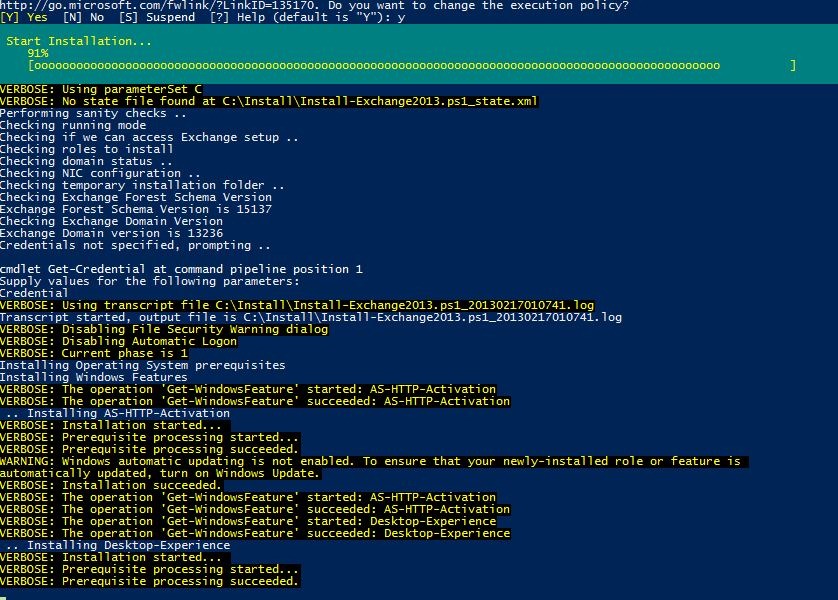
Back in 2013, I published an unattended installation script for Exchange Server 2013, together with a walkthrough on this blog. At the time, the goal was simple: make Exchange deployments more predictable, repeatable, and less error‑prone by removing as much manual interaction as possible.
Exchange has evolved, deployment practices have matured, and automation expectations are much higher. Over the past years, I have continued to maintain and refine the script to keep pace with those changes. Recently, I completed a major cleanup and refresh. Those watching my GitHub have likely seen the incremental changes.
This post serves as a refresher and high‑level overview on the current state.
Goal
This script automates the unattended installation of Microsoft Exchange Server 2016, 2019, and Exchange Server SE on Windows Server 2016 through 2025. For this, it follows a state machine process. This is necessary because some steps require a reboot before continuing.
The script handles the full installation lifecycle: Windows features, prerequisites (.NET, VC++ runtimes, IIS components), Active Directory preparation, Exchange setup, and post-configuration and hardening. With the -AutoPilot switch, the script manages automatic reboots and logon cycles, tracking progress in a JSON state file to track where it is in the process.
Supported Builds and Operating Systems
Exchange Version
Minimum OS
Maximum OS
Exchange 2016 CU23
Windows Server 2016
Windows Server 2019
Exchange 2019 CU10–CU14
Windows Server 2019
Windows Server 2022
Exchange 2019 CU15
Windows Server 2019
Windows Server 2025
Exchange Server SE RTM
Windows Server 2019
Windows Server 2025
For Exchange 2019 and up, deployment on Desktop or Core is supported. Support for Exchange 2013, older CUs for Exchange 2016 and Exchange 2019, and older operating systems (WS2008, WS2008 R2, WS2012, or WS2012 R2) has been removed since version 4.0 of the script.
Requirements
PowerShell 5.1 or later
Domain-joined system (Edge Server role is the exception)
An account with local administrator rights
When using -AutoPilot: the account must be able to configure and perform auto-logon
When creating a new Exchange organization (-Organization) or need to upgrade schema or domain configuration: Schema Admin and Enterprise Admin rights
Static IP address (running as an Azure VM is the exception)
Usage
The syntax for calling the script depends on which of the common scenarios you want to deploy. By default, it is to perform an installation:
The script Install-Exchange15.ps1 has a ton of options. An explanation of these is given in the table below. Depending on the operating mode (regular setup, preparation only, Edge Transport installation, or recovery), parameters may or may not become available.
Parameter
Description
-SourcePath
Path to Exchange setup EXE folder or ISO file
-Organization
Exchange organization name to create. Omit to skip AD preparation.
-InstallEdge
Install the Edge Transport server role instead of Mailbox
-AutoPilot
Fully automated mode — handles reboots and resumes automatically
-Credentials
Credentials AutoPilot uses for automatic logon after each reboot
-InstallPath
Working folder for state file, logs, and downloaded prerequisites (default: C:\Install)
This post replaces the previous articles on the installation script, which are still there for historical purposes (and to show what has been updated or replaced over time):
Defining dynamic parameters in advanced functions or scripts significantly enhances user experience and functionality by making these functions or scripts more intuitive and user-friendly, primarily when used interactively. For instance, with tab completion, parameters are offered – or not – based on specified conditions, guiding users toward correct usage patterns. This reduces errors and improves overall script robustness by ensuring users are directed toward the appropriate options, making the script more flexible and easier to use.
The seventh part of the Practical PowerShell series covers using dynamic parameters to enhance advanced functions or scripts, discussing both Parameter Sets and DynamicParam script block.
The practicalities of producing PowerShell output and generating logging are other essential scripting elements. No administrator likes to stare at a blank screen, wondering if the command just entered is functioning or not. Also, when performing bulk operations against multiple objects, it could be wise to register the success or failure of this operation in a manner that is useful for reporting. Depending on your use case, it can also be beneficial to log these failures so that they can easily be re-used for consecutive retries after remediation of the cause.
The sixth part of the Practical PowerShell series covers these topics, talking about output streams and logging.
Writing PowerShell scripts can be a fulfilling task. After all, you write something to assist with a task or procedure so you can focus on the result, not the task itself. But what if your script tries to run an action and is unsuccessful, for example, when a user the script attempts to manipulate is invalid or the signed-in account has insufficient permissions to run a cmdlet? And do not forget the peculiarities of the online world, such as a network connection dropping or an authentication token expiring.
This is where one of the often-undervalued aspects of writing resilient and “a less optimistic version” of scripts comes into the picture: exception handling, the topic of the fifth part in the Practical PowerShell series.