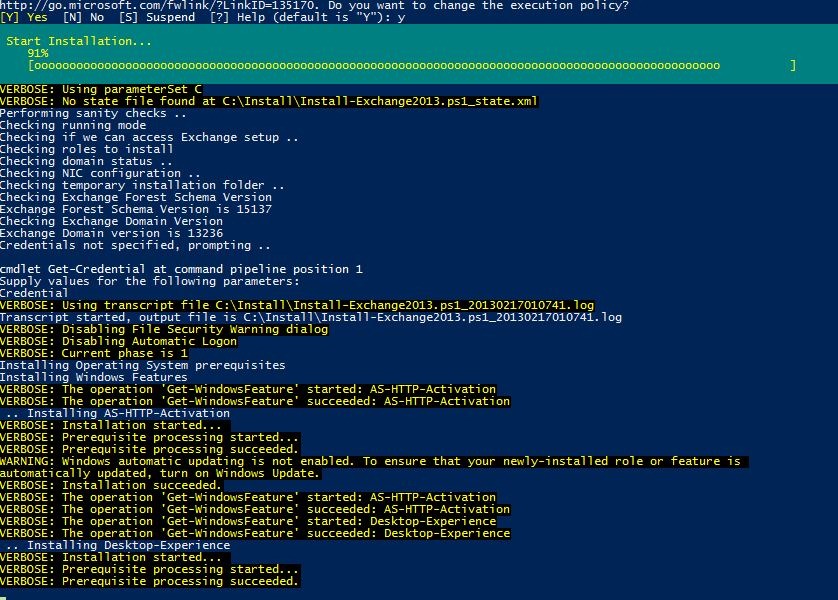
Results Install-Exchange15 survey


stats chartA short blog on a small survey Iā€™ve been running for some time now on the usage of Install-Exchange15, the PowerShell script for fully automated deployment of Exchange 2013 or Exchange 2016.

I started the survey because I was curious on a few things:

  • How the script is used; do folks use it for deploying in lab environments, or also actual production environments.
  • What Exchange versions are deployed; only current ones (n-2 at most, i.e. lagging 2 Cumulative Update generations at most), or also older versions.
  • What operating systems are used to deploy Exchange using this script.

The second and last items are of most interest, as keeping backward compatibility in the script, for example like deploying Exchange Server 2013 SP1 on Windows Servers 2008, requires keeping a lot of ā€˜legacy codeā€™ in there.

Fortunately, the survey shows many of you use the script to deploy recent Exchange builds on current operating systems. So, in time, you will see support for older builds and operating systems being removed, making the script more lean and mean as well.

Now, on to the results:

In what environments do you use the script to deploy Exchange?

Lab

Production

Yes

86%

72%

No

14%

28%

Do you use Install-Exchange15.ps1 for previous (N-2 or older) Exchange 2013/2016 builds?

Yes 28%
No 72%

On which Operating Systems do you deploy Exchange 2013/2016? (multiple options possible)

Windows Server 2008 0%
Windows Server 2008 R2 18%
Windows Server 2012 18%
Windows Server 2012 R2 100%
Windows Server 2016 8%

Finally, a summary of the feedback and requests send in by respondents through the open comments section:

  • Installation on Windows Server 2016. The survey was created before Windows Server 2016 was supported, so we used the feedback given on people deploying on WS2016 in the above results.
  • In general, positive feedback on having this script for automated deployment, as well as the SCP feature.
  • Request for having a GUI to create the answer file.
  • Request to having the option to configure the virtual directories after installation. However, the script allows for inserting custom (Exchange) cmdlets in its post-configure phase.
  • Request to output cause of failed Exchange setup to the screen. That however, is something I wouldnā€™t recommend; the Exchange setup log files contain the details.
  • Request to have some sort of visible clue if the installation was successful or not.

Public Folder Hierarchy and Client Access


Ex2013 LogoWhen investigating performance issues of a multi-node, multi-role Exchange 2013 server deployment, I found the CPU utilization of a single Exchange 2013 server constantly above the load of the rest.

When checking the Processor Utilization % for all Exchange servers using Performance Monitor, the daily trend image looked like this:

clip_image002

As you can clearly see, one single server is constantly experiencing more load than the other servers. It is also above the 80% mark, causing all sorts of potential side-effects if Managed Availability would kick in.

When checking the processes on that server, the major CPU load was generated by the Microsoft.Exchange.RPCClientAccess.service as well as the related w3svc# process. The load balancer performed a near even distribution of client connections over these servers. You can use the Exchange Performance Health Checker script with the LoadBalancingReport switch to verify this.

Next, we checked if there was an overactive mailbox on that particular server. For that purpose, we ran the following cmdlet in the Exchange Management Shell, which showed us the Public Folder mailbox was very active:

Get-StoreUsageStatistics ā€“Server <ExchangeServer> | ? {$_.DigestCategory ā€“eq ā€˜timeInServerā€™} | Sort TimeOnServer ā€“Descending

image

Note: More on tracking overactive mailboxes using Get-StoreUsageStatistics in this excellent write-up by Andrew HigginBotham.

Another clue was provided through the PublicFolders Healthset, which was picked up by System Center Operations Manager as well:

The PublicFolders Health Set has detected a problem with PublicFolderMailbox.ConnectionCount at 10-7-2016 06:12:22. 0 failures were found. The Health Manager is reporting that The total number of hierarchy connections for public folder mailbox PFMailbox1 has reached 2001. Consider creating a new public folder mailbox for load balancing hierarchy accesses.

Apparently, there were more than 2,000 connections being made to the PFMailbox1 Public Folder mailbox. This was odd, as there were multiple Public Folder mailboxes created with hierarchy. Users are expected to be automatically distributed over these mailboxes, falling within the 2,000 concurrent logons limit as mentioned here. Note that this limit applies to public folder mailboxes serving hierarchy as well; even if clients donā€™t access Public Folders, they still will connect to these Public Folder mailboxes in order to obtain hierarchy information.

Next thing we checked was to which default Public Folder mailbox mailboxes were configured to connect. To accomplish this we can inspect the mailbox property DefaultPublicFolderMailbox:

Get-Mailbox ā€“ResultSize Unlimited | Group-Object DefaultPublicFolderMailbox ā€“NoElement

Count Name
----- ----
10139 contoso.com/Accounts/Users/PFMailbox1

Apparently all mailboxes were automatically set to connect to a single Public Folder mailbox. Then maybe something was preventing the other Public Folders from serving hierarchy:

Get-Mailbox ā€“PublicFolder | Select Name,*Hierarchy*

NameĀ Ā Ā Ā Ā Ā  IsExcludedFromServingHierarchy IsHierarchyReady
----Ā Ā Ā Ā Ā Ā  ------------------------------ ----------------
PFMailbox1 FalseĀ Ā Ā Ā Ā Ā Ā Ā Ā Ā Ā Ā Ā Ā Ā Ā Ā Ā Ā Ā Ā Ā Ā Ā Ā  True
PFMailbox2 FalseĀ Ā Ā Ā Ā Ā Ā Ā Ā Ā Ā Ā Ā Ā Ā Ā Ā Ā Ā Ā Ā Ā Ā Ā Ā  False
PFMailbox3 FalseĀ Ā Ā Ā Ā Ā Ā Ā Ā Ā Ā Ā Ā Ā Ā Ā Ā Ā Ā Ā Ā Ā Ā Ā Ā  False
PFMailbox4 FalseĀ Ā Ā Ā Ā Ā Ā Ā Ā Ā Ā Ā Ā Ā Ā Ā Ā Ā Ā Ā Ā Ā Ā Ā Ā  False

IsExcludedFromServingHierarchy was False for all 4 servers, which indicates they are not blocked from serving hierarchy. However, the hierarchy was not ā€˜readyā€™ for 3 of them. This could be due to the hierarchy being out of date or not being created at all.

The output of (Get-PublicFolderMailboxDiagnostics PFMailbox2 -IncludeHierarchyInfo).SyncInfo indeed indicated there were problems synchronizing contents from the PFMailbox1 mailbox. We then ran the following cmdlet to trigger updating synchronizing the hierarchy again:

Update-PublicFolderMailbox ā€“InvokeSynchronizer ā€“Identity PFMailbox2

image

The Get-Mailbox ā€“Identity PFMailbox2 ā€“PublicFolder | Select Name,*Hierarchy* now showed IsHierarchyReady was True. We ran the same cmdlet for the other two Public Folder mailboxes as well.

After a while, we verified the effect on the assignment of DefaultPublicFolderMailbox on the mailboxes:

Get-Mailbox ā€“ResultSize Unlimited | Group DefaultPublicFolderMailbox ā€“NoElement

Count Name
----- ----
2601Ā  contoso.com/Accounts/Users/PFMBPFMailbox2
2309Ā  contoso.com/Accounts/Users/PFMBPFMailbox4
2632Ā  contoso.com/Accounts/Users/PFMBPFMailbox1
2597Ā  contoso.com/Accounts/Users/PFMBPFMailbox3

Public folder assignments were now (more or less) equally distributed over the 4 Public Folder mailboxes, and life was good.

We also verified Public Folder access distribution by querying the Exchange RpcClientAccess log files. An excellent tool to aid in this task is LogParser with LogParser Studio. We configured LogParser Studio to query log files at ā€˜<Installation folder>\Logging\RPC Client Accessā€™ on the Exchange servers. The query used, grouped all entries per date, operation (in this case we are only interested in PublicLogon), and part of the field ā€˜operation-specificā€™; more exactly, the legacyDN part which tells which (Public Folder) mailbox was accessed:

SELECT EXTRACT_PREFIX([#Fields: date-time], 0, ‘T’) As Date, Count (*) as Total, [Operation],
EXTRACT_PREFIX(EXTRACT_SUFFIX([operation-specific], 0, ‘cn=’), 0, ‘ in database ‘) as PFMailbox
FROM ‘[LOGFILEPATH]’
WHERE [operation]=’PublicLogon’
AND [failures] IS NULL
GROUP BY Date, [Operation], PFMailbox
ORDER BY Date ASC

The output showed all Public Folder mailboxes were now accessed by clients, and logons to the Public Folder mailboxes were now (more or less) equally distributed:

image

Blocking Mixed Exchange 2013/2016 DAG


Ex2013 LogoIn the RTM version of Exchange 2016, thereā€™s an issue in that it is allows you to add Exchange 2016 Mailbox servers to Exchange 2013 Database Availability Groups, and vice-versa. As stated in the Release Notes (you do read those?), creating such a mixed version DAG is not supported. In theory, you could even jeopardize your Exchange data, as database structures from both versions are different. This action is also not prevented from the Exchange Admin Center, requiring organizations to have very strict procedures and knowledgeable Exchange administrators.

If you are worried about this situation and you want to prevent accidently adding Mailbox servers to an existing DAG consisting of members of a different Exchange version, there is a way (until this is blocked by the product itself, of course). Cmdlet Extension Agents to the rescue!

The Scripting Agent not only allows you to add additional instructions to existing Exchange cmdlets, but also to provide additional validation before cmdlets are executed. I did two short articles on Cmdlet Extension Agentsā€™ Scripting Agent here and here, so I will skip introductions.

First you need to download a file named ScriptingAgentConfig.xml from the location below. If you already have Scripting Agents, you need to integrate the code in your existing ScriptingAgentConfig.xml files. The code checks if the server you want to add using the Add-DatabaseAvailabilityGroup cmdlet is of a different major version than one of the current DAG members.

Next, you need to copy this ScriptingAgentConfig.xml file to $ENV:ExInstallPath on every Exchange 2013 and Exchange 2016 server in your organization, e.g. C:\Program Files\Microsoft\Exchange Server\V15\Bin\CmdletExtensionAgents\ScriptingAgentConfig.xml.Ā  To help your with this process, Exchange fellow Paul Cunningham made a small script to push this XML from the current folder to every Exchange server in your organization, PushScriptingAgentConfig.ps1.

Last step is to enable the Scripting Agent using:

Enable-CmdletExtensionAgent ‘Scripting Agent’

After distributing the scripting agent file and enabling the scripting agent, when you try to add an Exchange 2016 (version 15.1) server to an Database Availability Group consisting of Exchange 2013 Mailbox servers, using Add-DatabaseAvailabilityGroupServer, you will receive an error message:

DAGCheck

This also works vice-versa, thus when you inadvertently try to add Exchange 2013 servers to an Exchange 2016 Database Availability Group, provided you distributed the XML on the Exchange 2013 servers as well. The error is also thrown when you try to perform this action using the Exchange Admin Console.

You can download the ScriptingAgentConfig.XML for blocking Mixed Exchange 2013/2016 DAGs from the TechNet here.

Clearing AutoComplete and other Recipient Caches


Exchange 2010 Logo

Last version: 1.21, April 28th, 2021: Updated formatting and link to GitHub

Anyone who has participated in migrations or transitions to Exchange has most likely encountered or has had to work around potential issues caused by the nickname cache. A ā€œcache,ā€ also known by its file extension, NK2 in older Outlook clients, is a convenience feature in Outlook and Outlook WebApp (OWA) which lets users pick recipients from a list of frequently-used recipients. This list is displayed when the end user types in the first few letters.

The potential issue revolves around end users using those lists to send messages, as the list contains cached recipient information. Because this information is static, it may become invalid at some point. Thus, when users pick recipients when sending messages, they may be sending messages to non-existent recipients or invalid e-mail addresses, which create issues like non-delivery of e-mail.

Read the full article over on ENow Solutions Engine blog.

Clean-AutoComplete

Using the script mentioned in the article, which can be used to clear cached recipient information, is straightforward. It requires Exchange 2010 or later and Exchange Web Services Managed API 1.2 (or later) which you can download here. Alternatively, you can copy the Microsoft.Exchange.WebServices.DLL with the script as it will also look for it in the current folder.

The script Clean-AutoComplete.ps1 has the following syntax:

Clear-AutoComplete.ps1 [-Mailbox] <String> [-Server <String>] [-Impersonation] [-Credentials <PSCredential>] [-Type <Array>] [-Pattern <String[]>]

Where:

  • Mailbox is the name or e-mail address of the mailbox.
  • Server is the name of the Client Access Server to access for Exchange Web Services. When omitted, the script will use AutoDiscover.
  • Switch Impersonation specifies if impersonation will be used for mailbox access, otherwise the current user context will be used.
  • Credentials specifies the user credentials to use.
  • Type specifies what cached recipient information to clear. Options are Outlook  (Outlook AutoComplete stream), OWA (OWA Autocomplete stream), SuggestedContacts, RecipientCache or All. Default is Outlook,OWA.
  • Pattern is the pattern of e-mail entries to remove from cache. Only works with OWA, SuggestedContacts and RecipientCache type clearances.

So for example, suppose you want to clear the Autocomplete stream used by Outlook on a mailbox, you can use:

Clear-AutoComplete.ps1 -Identity Olrik -Type Outlook -Verbose
ScreenCap

To remove the Autocomplete stream used by OWA on your Office 365 account, you can use:

Clear-AutoComplete.ps1 -Identity olrik@office365tenant.comĀ ā€“CredentialsĀ (Get-Credential)Ā ā€“Type OWA

Be advised that clearing the Outlook AutoComplete stream will only have effect for Outlook running in Online mode. Outlook caches this information as well in the OST file, leaving the options of running Outlook with the /CleanAutocompleteCache switch, or remove and let Outlook recreate the OST file. The temporaryĀ Stream_AutoComplete *.dat files created under %USERPROFILE%\AppData\Local\Microsoft\Outlook\RoamCache are used by Outlook to speed things up.

Disabling Auto-Complete and Suggested Contacts
Alternatively, you can disable Auto-Complete, the equivalent of unchecking the Outlook option ‘Use Auto-Complete List to suggest names when typing in the To, Cc and Bcc line‘, by setting the following registry key:

Note: In the examples below, you need to modify the version number in the examples corresponding to the Outlook version you wish to apply these settings against. Use 16.0 as indicated for Outlook 2016, but change it to 15.0 for Outlook 2013, or 14.0 for Outlook 2010.

HKEY_CURRENT_USER\Software\Microsoft\Office\16.0\Outlook\Preferences\
ShowAutoSug=0 (REG_DWORD)

To configure this setting using a Group Policy, use the following registry setting:

HKEY_CURRENT_USER\Software\Policies\Microsoft\office\16.0\Outlook\Preferences\ShowAutoSug=0 (REG_DWORD)

You can also disable Suggested Contacts folder, the equivalent of unchecking the Outlook option ‘Automatically create Outlook contacts for recipients that do not belong to an Outlook Address Book’, with the following registry key:

HKEY_CURRENT_USER\Software\Microsoft\office\16.0\Outlook\Contact\CreateContactsForOneOffs= 0 (REG_DWORD)

The related Group Policy setting is:

HKEY_CURRENT_USER\Software\Policies\Microsoft\office\16.0\Outlook\Contact\CreateContactsForOneOffs= 0 (REG_DWORD)

Feedback
Feedback is welcomed through the comments. If you got scripting suggestions or questions, do not hesitate using the contact form.

Download
You can download the script from GitHub here.

Configuring Anti-Affinity in Failover Clusters


powershellMany customers nowadays are running a virtualized Exchange environment, utilizing Database Availability Groups, load balanced Client Access Servers and the works. However, I also see environments where it is up to the Hypervisor of choice on the hosting of virtual machines after a (planned) fail-over. This goes for Exchange servers, but also for redundant infrastructure components like Domain Controllers or Lync Front-End servers for example.

So, leaving it to “default” is not a good idea when you want to achieve the maximum availability potential. Think about what will happen if redundant roles are located on the same host and that host goes down. What you want to do is prevent hosts from becoming the single point of failure, something which can be accomplished by using a feature called anti-affinity. This will distribute virtual machines over as much hosts as possible. Where affinity means to have an preference for, like in Processor Affinity for processes, Anti-Affinity can be regarded as repulsion in magnetism.

image

For VMWare, you can utilize DRS Anti-Affinity rules; Iā€™ll describe how you can configure Anti Affinity in Hyper-V clusters using the AntiAffinityClassNames property (which by the way already exists since Windows Server 2003). And yes, property means itā€™s not accessible from the Failover Cluster Manager, but Iā€™ve create a small PowerShell script which lets you configure the AntiAffinityClassNames property (in pre-Server 2012 you could also use cluster.exe to configure this property).

Note: For readability, when you see virtual machine(s), read cluster group(s); In Microsoft failover clustering, a clustered virtual machine role is a cluster group.

Now, before weā€™ll get to the script, first something on how AntiAffinityClassNames works. The AntiAffinityClassNames property may contain multiple unique strings which you can make up yourself. Iā€™d recommend creating logical names based on the underlying services, like ExchangeDAG or ExchangeCAS. When a virtual machine is moved the process is as follows:

  1. When defined, the cluster tries to locate the next preferred node using the preferred owner list;
  2. Does the designated node host a virtual machine with a matching element in their AntiAffinityClassNames property; if not, the designated host is selected; if it is, move to the next available preferred owner and repeat step 2;
  3. If the list is exhausted (i.e. only anti-affined hosts), the anti-affinity attribute is ignored and the preferred owner list is checked again, ignoring anti-affinity (ā€œlast resortā€).

Traces of Anti-Affinity influencing failover behavior can be found in the cluster event log:

00000648.00000d54::2013/07/22-10:40:33.162 INFOĀ  [RCM] group ex2 should fail back from node 2 to node 3 now due anti-affinity

Usage
Now on to the script, Configure-AntiAffinity.ps1. The syntax is as follows:

Configure-AntiAffinity.ps1 [-Cluster] <String> [-Groups] <Array> [-Class] <String> [[-Overwrite]] [[-Clear]] [<CommonParameters>]

A small explanation of the available parameters:

  • Cluster is used to specify which cluster you cant to configure (mandatory);
  • Groups specifies which Cluster Groups (Virtual Machines) you want to configure Anti-Affinity for (mandatory);
  • Class specifies which name you want to use for configuring Anti-Affinity (optional, AntiAffinityClassName);
  • When Overwrite is specified, all existing Anti-Affinity class names will be overwritten by Class for the specified Groups, otherwise Class will be added (default);
  • When Clear is specified, all existing Anti-Affinity class names will be removed for the specified Groups;
  • The Verbose parameter is supported.

So, for example assume you have 3+ Hyper-V cluster named Cluster1 consisting of 3+ nodes running 3 virtualized Exchange servers hosting a 3-node DAG, ex1, ex2 and ex3 and you want to configure anti-affinity for these virtual machines using the label PRODEX, you could use the script as follows :

Configure-AntiAffinity.ps1 -Cluster Cluster1 -Groups ex1,ex2, ex3 ā€“Class PRODEX ā€“Verbose

To clear anti-affinity you could use:

Configure-AntiAffinity.ps1 -Cluster Cluster1 -Groups ex1,ex2,ex3 -Clear

Hereā€™s a screenshot of the script for creating anti-affinity, add additional anti-affinity class names and clearing anti-affinity settings:

image

Feedback
Feedback is welcomed through the comments. If you got scripting suggestions or questions, do not hesitate using the contact form.

Download
You can download the script from the TechNet Gallery here.

Revision History

Exchange 2013 Unattended Installation Script v1.5 (Updated)


Ex2013 LogoI’m pleased to announce that the Exchange 2013 unattended installation script has been updated and supports fully automated installation of Exchange 2013 on Windows Server 2008 R2 SP1.

The new version contains the following changes:

  • Added support for Windows Server 2008 R2 SP1. To fulfill the requirements, code was added to install .NET Framework 4.5, Windows Management Framework 3, disable/enable Internet Explorer Enhanced Security Configuration (IE-ESC), install required hotfixes KB974405, KB2619234 and KB2758857 (which supersedes KB2533623).
  • Because of the mandatory reboot after installation of the hotfixes, a phase was inserted; this phase will be skipped when installing on Windows Server 2012.
  • Added InstallPath to AutoPilot parameter set (or default path won’t get set).

You can download the updated version of the script via the original Exchange 2013 Unattended Installation Script page (which also contains instructions) or directly from the Technet Gallery.

The script has been tested with Exchange 2013 CU1 but it should work with RTM as well (if you must ..). Your feedback is very much welcomed!

The last version is version 1.53, dated June 15th, 2013; For changes, consult the changelog on the original article or Technet Gallery page.

Review: Exchange Data Center Switchover Tool (Updated)


Last week, the Exchange team released what they called the “Exchange 2010 datacenter switchover tool” (note that the title mentions troubleshooter). The tool could prove helpful to some and can be insightful to others.

While I applaud any effort put in to minimize risks and the possibility of human error, especially in stressful situations like data center switchovers, I do have some suggestions for improvement.

First, the name. A “tool” might imply it’s something to aid in the switchover process, while in fact it’s more of an interactive decision maker or guide walking you through the process and can be utilized to practice dry runs or test formalized procedures.

That brings me to my second point, which is the format. A process like a data center switchover with all its decision moments is perhaps better translated to a flow chart rather than an interactive PowerPoint slide deck, which looks good on screen but can’t be printed. Also, a PDF or XPS might be more convenient; not everyone has PowerPoint at hand all the time, especially when working remotely on servers.

Finally, the contents is almost taken directly from the original Technet data center switchover article here, with the same questions and steps. It could perhaps be turned in a more valuable tool if it could read the environment and tailor questions based on what it discovers.

You can check out the “troubleshooter” yourself by downloading it here. Of course, this is only the first version; I suggest you leave feedback and suggestions on how to improve the tool in the accompanying article on the Exchange Team blog here.

Update October, 24th:UC Architects fellow Serkan Varoglu created a Exchange Data Center Switchover workflow diagram; you can download it here.

Load balancing Exchange 2010 using a KEMP Virtual LoadMaster


In an earlier blog, I mentioned the requirement for an external load balancer when co-locating Exchange server roles, because Failover-Clustering and Network Load Balancing (NLB) are mutually exclusive. However, there are also situations when a load balancer is a better solution over Windows built-in NLB, mainly because there are some things NLB canā€™t do or doesnā€™t do well, like:

  • Service awareness: NLB distributes clients over member nodes, even over nodes of which required services, like IIS or RPC Client Access Service, are not responding;
  • Experience: Clients need to reconnect after adding or removing nodes;
  • Scalability : itā€™s not recommended to scale NLB beyond 8 nodes;
  • Affinity (also known as persistence or sticky sessions): NLB can only do Source IP affinity, i.e. distribute clients based on their IP address, while load balancers can utilize cookies or SSL session IDs.

Note: Why affinity is important and why Source IP can be bad sometimes, you can read in one of my earlier blogs on load balancing Exchange ActiveSync here.

To show you setting up a load balancer doesnā€™t have to be rocket science, Iā€™ll demonstrate how to implement a load balancer for Exchange 2010 using a KEMP Virtual Loadmaster (VLM); setting up other load balancers should be similar, hardware appliances included, but keep in mind implementations by vendors vary, so check the product documentation as well. However, the basics are same, you only need to understand what you’re trying to achieve.

Note: The KEMPā€™s VLM used for this article runs on Hyper-V, but there are virtual load balancers for different hypervisors as well.

The setup weā€™re going to work with is roughly as follows:

Kemp-HA-Setup-v1

In the sample environment, Iā€™ve installed two Exchange 2010 servers, L12EX1 and L12EX2; both hold the Client Access, Hub Transport and Mailbox server roles. The domain name used is litware.com, and we have no site nor subnet definitions, so everything is located in the default Active Directory site, Default-First-Site-Name. Clients will access Exchange services (HTTPS, MAPI) using a single FQDN, outlook.litware.com.

The Exchange servers are located in a dedicated subnet, so weā€™ll use a so called two-armed setup (2 NICs); one NIC will connect the VLM to the subnet where the Exchange servers are located; the other one will be used for client access. In order to have the VLM work transparently, we configure the VLM as default gateway on the CAS servers. The result is that the CAS servers will see the original client IP addresses instead of the VLM’s address, which is not only helpful in log files, but is also needed for throttling or when limiting SMTP connections to Receive Connectors based on IP addresses for example.

Note: This article doesnā€™t describe implementing SSL offloading; for more information on SSL offloading and how to configure it, check this Technet article. Also, this article doesn’t go into any built-in ability of load balancers to mirror or create standby copies, meant to prevent the load balancer from becoming a Single Point Of Failure (SPOF) or improve Availability level.

Weā€™ll start off by downloading the KEMP Virtual Loadmaster here. After downloading, extract the contents and import the VM in Hyper-V. After firing it up, it will use DHCP or 192.168.0.1 if DHCP is unavailable. You can check the console to see what IP address is used:

image

Now, before we can configure the VLM, we need to perform the initial setup:

  • Use the console to log in using the administrator account or connect with a browser to the VLMā€™s IP address;
  • If you havenā€™t got an activation key, you can apply for a trial key;
  • Complete licensing of the VLM;
  • Configure VLM network interfaces;
  • Import Configure certificate

Note: Make sure you set the MAC addresses of your NICs to static. When going through the licensing process, the access code is based on MAC address. If you don’t, the license will be invalidated if you migrate to a different host.

Note: Weā€™re going to load balance services over port 443 and the administrative web interface uses that port as well, so configure the GUI on a different IP address or port.

Next, we need to create a Client Access Server Array. Note that creating a CAS Array before creating or moving mailboxes is best practice, as it prevents having to reconfigure Outlook MAPI profiles when clients have already connected (unless you want to perform mailbox move tricks to force MAPI reconfiguration). Basically, the steps to perform are:

  • Create a DNS record with FQDN which is going to be used for clients to connect. In our example, the FQDN used is outlook.litware.com using IP number 172.16.10.100;
  • Create a CAS Array object using New-ClientAccessArray, i.e.New-ClientAccessArray -Name outlook-default -Fqdn outlook.litware.com -Site Default-First-Site-Name

image

  • As per best practice, weā€™re fixing the RPC (59531) and Addressbook (59532) ports by setting the following registry keys on each CAS server and restarting the related MSExchangeRpc and MSExchangeAB services:

HKLM\System\CurrentControlSet\Services\MSExchangeRPC\ParametersSystem\TCP/IP Port = 0xe88b (59531)Ā  REG_DWORD

HKLM\System\CurrentControlSet\Services\MSExchangeAB\Parameters\RpcTcpPort = ā€59532ā€ (REG_SZ)

You can verify Exchange is listening on these ports using netstat ā€“an | find ā€œ5953ā€.

image

  • Finally, we need to configure the mailbox databases with the new RPC endpoint using Set-MailboxDatabase in conjunction with the RpcClientAccessServer parameter:Get-MailboxDatabase | Set-MailboxDatabase -RpcClientAccessServer outlook.litware.com

Note: More information on creating CAS Arrays, check here.

After creating the CAS array, fixing the ports on Exchange and reconfiguring the RPC endpoint configuration on mailbox databases, configure the Exchange URLs to match the new client endpoint FQDN, outlook.litware.com. To so so, use cmdlets like Set-OWAVirtualDirectory ā€“InternalURL https://outlook.litware.com/owa or Set-WebServicesVirtualDirectory ā€“InternalURL https://outlook.litware.com/EWS/Exchange.asmx. In addition to InternalURL, set the ExternalURL as well depending on your setup, i.e. HTTPS services may be load balanced at the reverse proxy.

Now weā€™re ready to configure the VLM. We start off by creating Virtual Services, which are a combination of IP address and ports. Each Virtual Service has itā€™s own characteristics, like persistence, scheduling (distribution), can have its own certificate, distribution mechanism and appointed set of real (backend) servers and related service monitors.

We decided to use a single IP address for the various Exchange services, so we only need to configure a single Virtual Service for each port, via Virtual Services > Add New:

image

In the next screen you need to configure the Virtual Service settings like persistence and scheduling, as well as configure the real servers, i.e. the backend servers actually providing the service. You can also configure how the service health on the real server is monitored, i.e. is the service up or down. If a service on a real server is considered down, the load balancer wonā€™t send clients to that server for that particular Virtual Service.

Note: The overview below is taken from a non-SSL offloading (SSL acceleration) configuration; when enabled, it will show additional options on the certificate to use.

image

Note: When using ā€œLeast Connectionā€ persistence as recommended in the KEMP documentation, be advised a client traffic storm can occur after the Real Server comes online. Reason is it starts without connections, so all new clients will be directed to this server. Other products have mechanisms in place to prevent this by throttling traffic, gradually increasing the connections; F5 calls this feature Slow Ramp Timeout in their F5 BIG-IP Local Traffic Manager products.

When configuring the Virtual Service, click Add New to add a Real Server to the Virtual Service.

image

A suggestion on how to configure the Virtual Services:

Virtual Address Port Service Name Persistence Scheduling
172.16.10.101 443 Exchange-HTTPS Super HTTP Round Robin
172.16.10.101 59531 Exchange-RPC Source IP Round Robin
172.16.10.101 59532 Exchange-AB Source IP Round Robin
172.16.10.101 135 Exchange-EPM Source IP Round Robin

Note: When required, you can also load balance inbound SMTP traffic using ports 25/587, IMAP4 (ports 143/993) and POP (110/995) using no persistence.

Note: Using Source IP can result in an unbalanced distribution of client load, when SNAT devices come into play. For an example scenario, see my earlier article on Load balancing, ActiveSync and Affinity.

And thatā€™s basically it. When you want to channel specific HTTP services (Outlook WebApp, Exchange ActiveSync, Autodiscover etc.) you can appoint different FQDNs for each service and configure different FQDN/IP addresses per service in DNS, after which you can configure separate Virtual Services with more specific options. For example, you can not only configure specific persistence or scheduling settings for per Virtual Service, but also Real Servers checks (depending on the protocol). Instead of checking if a Real Server responds on port 443, you can check if the server responds on a different URL, e.g. https://<server>/owa.

image

Another bonus of using a load balancer, depending on functionality of the product used of course, is that you can (temporarily) disable a real server from the VLM. After doing this, clients wonā€™t be directed to the corresponding Exchange server, which is very useful when you want to perform maintenance.

image

In this article we quickly went through setting up a KEMP VLM to load balance Exchange 2010 services. However, the article is based on certain decisions regarding the configuration, which can differ from organizational to organization. For more information on deploying KEMP VLM and its possibilities, check out the KEMP Virtual LoadMaster Deployment Guide here.

Most vendors, like KEMP, provide template functionality, which enables you to quickly set up the load balancer using preconfigured settings; make sure you inspect those settings afterwards (i.e. know what you’re doing). You can download KEMP templates here. Unfortunately, these files are in binary format so you can’t edit them nor can you export Virtual Services, otherwise I could have provided you with the template for the above settings.

Be advised that I am in no way connected to KEMP and this article hasn’t been sponsoredĀ  or commissioned by KEMP technologies, apart from providing an NFR license for writing and testing purposes.

Exchange can’t start due to misconfigured AD sites


Recently, a customer had issues with their Exchange server which didnā€™t start properly after rebooting. After checking out the Eventlog, I noticed the it was full of messages, generated by all services. The most interesting events were the ones generated by MSExchange ADAccess:

MSExchange ADAccess, EventID 2141
Process STORE.EXE (PID=2996). Topology discovery failed, error 0x8007077f

MSExchange ADAccess, EventID 2142

Process MSEXCHANGEADTOPOLOGYSERVICE.EXE (PID=1760). Topology discovery failed, error 0x8007077f

Also, the results of the active directory discovery process generated every 15 minutes, which are normally logging in event 2080, ā€œExchange Active Directory Provider has discovered the following servers with the following characteristicsā€, was missing.

Note that because the system could start the Microsoft Exchange Active Directory Topology service (until it failed and is restarted by dependent services), Exchangeā€™s other services were also triggered, leading to almost indefinitely restarting services as configured in their corresponding service recovery actions sections.

Now, since I had connected to a domain controller using an RDP session from my client, and I was able to connect to port 389 (Global Catalog) from Exchange using LDP, so communications looked ok. Then, I switched to Active Directory Sites and Services:

image

As you can see from the shot, here was a potential cause of the problem. First, there was a site without domain controllers. Second, there were no subnets defined. So, in this situation, it is undetermined in which site Exchange is located.

When a system canā€™t be determined to which site a computer belongs, the function DSGetSiteName, used to retrieve the current site, returns an error 1919 0x77f (ERROR_NO_SITENAME). Consequently, the Exchange Active Directory discovery process fails and eventually Exchange fails. You can inspect the current discovered site using nltest /dsgetsite or by having a peek in the registry at HKLM\System\CurrentControlSet\Services\Netlogon\Parameters\DynamicSiteName.

Now, to solve the situation we have three options:

  1. Making the site association static using a registry key, which isn’t a best practice.If you must, set registry key HKLM\SYSTEM\CurrentControlSet\Services\Netlogon\Parameters\SiteName (REG_SZ) to the desired site name;
  2. Adding proper subnet definitions;
  3. Remove the empty site definition.

It turned out the empty site was a place holder for a future site, so we went with the option of adding proper subnet definitions. After adding subnet definitions, like you normally should when working with multiple sites, including the scopes where the Exchange servers and domain controllers were located, and associating it with the main site, things started working again.

Note that the NetLogon service determines site association membership at startup and every 15 minutes. The Microsoft Exchange Discovery Topology service maintains this information by caching the information in the msExchServerSite attribute of the Exchange server object, in order to reduce load on active directory and DNS. Therefor, you might need to wait or restart Microsoft Exchange Discovery TopologyĀ  if you want to renew site association membership.

TechEd North America 2012 sessions


With the TechEd North America 2012 event still running, recordings and slide decks of finished sessions are becoming available online. Here’s an overview of the Exchange-related sessions: